
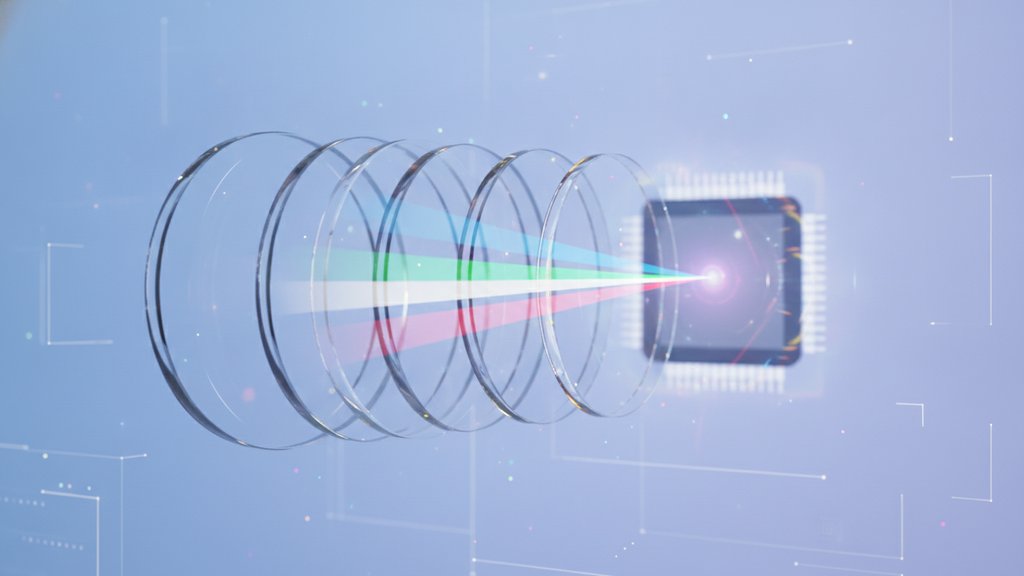
Chromatic aberration is a lens defect where different colors of light focus at slightly different points, leaving colored fringes (usually purple, magenta, green, or cyan) along high-contrast edges in your photos. It happens because glass bends each wavelength of light by a different amount, so red, green, and blue don't all land in the same spot on your camera's sensor. That color separation is exactly what you see as color fringing.
Content Table
What Chromatic Aberration Actually Is
Light is made of many wavelengths, and each one behaves a little differently when it passes through glass. A camera lens tries to bend all those wavelengths so they meet at one focal point on the sensor. When the lens can't pull that off perfectly, the colors split apart. This splitting is a form of lens aberration, and the visible result is what most people call color fringing.
Think of a glass prism. Point white light at it and you get a rainbow, because the prism separates each color by a slightly different angle. Your lens is doing a milder version of the same thing without meaning to. That chromatic shift is usually invisible in flat areas of an image but becomes obvious wherever a dark subject meets a bright background.
What Causes Color Fringing
The root cause is dispersion: glass has a different refractive index for each wavelength. Shorter wavelengths (blue and violet) bend more than longer ones (red). Because of this, the colors don't converge at the same place. A few real-world factors make it worse:
- Cheaper glass: Budget lenses often use standard optical glass that disperses light more than premium low-dispersion glass.
- Wide apertures: Shooting at f/1.4 or f/2 lets light hit the outer edges of the lens, where aberration is strongest.
- Long zoom ranges: Superzoom lenses juggle many focal lengths and tend to compromise on color correction.
- High-contrast edges: Backlit branches, chrome trim, or a rooftop against a bright sky all expose fringing instantly.
Lens makers fight this using special glass. Elements labeled ED, UD, or fluorite are designed to keep the wavelengths together. Apochromatic (APO) lenses go further and correct three colors at once, which is why they cost more.
The Two Main Types
Not all color fringing looks the same, and knowing the type helps you fix it faster.
| Type | What You See | Where It Appears |
|---|---|---|
| Longitudinal (axial) | Purple/green halos, often on both sides of an edge | Across the whole frame, worst at wide apertures |
| Lateral (transverse) | Colors shifted sideways, usually cyan and magenta | Increases toward the corners and edges |
Longitudinal aberration is the stubborn one. Stopping down the aperture reduces it, but software can't always remove it cleanly. Lateral aberration is easier because it's a predictable sideways shift, and most editors can correct it almost perfectly.
When It Shows Up Worst
You'll notice optical distortion of color most in these situations:
- Tree branches or power lines silhouetted against a bright sky
- Shiny highlights, like sunlight on water, metal, or glass
- Portraits shot wide open where hair meets a bright background
- The far corners of images taken with wide-angle lenses
Zoom to 100% on any high-contrast edge and look for a thin colored line that shouldn't be there. If a black railing has a purple glow on its top edge and a green glow underneath, that's textbook longitudinal aberration.
How to Reduce It While Shooting
You can cut fringing before it ever reaches the editing stage:
- Stop down the aperture: Moving from f/1.8 to f/5.6 often shrinks longitudinal aberration dramatically.
- Avoid extreme backlighting: Recompose so your subject isn't a dark shape against a blown-out sky.
- Use the lens's sweet spot: Most lenses show the least aberration two or three stops from wide open.
- Frame important detail toward the center: Lateral fringing is weakest there.
How to Fix It in Editing
Most fringing can be removed after the fact. The general approach across editors looks like this:
- Enable lens profile correction if your editor recognizes the lens. It removes predictable lateral aberration automatically.
- Use the defringe or chromatic aberration tool and target the specific purple and green hues.
- Adjust the amount sliders until the colored edges fade without desaturating real colors in the scene.
- Zoom to 100% and check corners and high-contrast edges to confirm the fix.
Fringing is a color problem, so it fits naturally into a broader color correction workflow. Once the fringes are gone, you can move on to white balance and tone with a cleaner starting point. Getting edges clean also matters when you plan to enlarge a shot, which ties into keeping detail sharp when you prepare photos for printing. And if you care about how colors interact overall, understanding color harmony helps you judge which color shifts are flaws versus intentional choices.
Keep your color detail intact when you convert photos
After you clean up chromatic aberration and color fringing, our free image converter lets you save your edited photos in the right format without crushing the color detail you worked to preserve.
Try Our Free Image Converter →
No. It's a normal optical property of glass, not damage. Every lens shows some chromatic aberration because different wavelengths of light bend by different amounts. Expensive lenses reduce it with special glass, but even they can't eliminate it completely in challenging light.
Longitudinal aberration typically produces purple fringing in front of the focal plane and green behind it. This happens because blue and red wavelengths focus at different distances than green. Those two colors are simply the most visible byproduct of that focus mismatch.
Lateral aberration usually comes out almost perfectly with lens profiles and defringe tools. Longitudinal aberration is harder because it appears across the whole frame and overlaps real colors. You can reduce it a lot, but heavy cases may leave faint traces that are tough to erase.
Stopping down helps a lot with longitudinal aberration because it blocks light from the lens edges where the effect is strongest. It has less impact on lateral aberration, which depends on position in the frame rather than aperture. So a smaller aperture helps, but it isn't a cure-all.
Chromatic aberration splits colors and creates colored fringes along edges. Lens distortion bends straight lines so they curve inward or outward. One is a color error, the other is a shape error. They come from different optical causes and are corrected with different editing tools.