

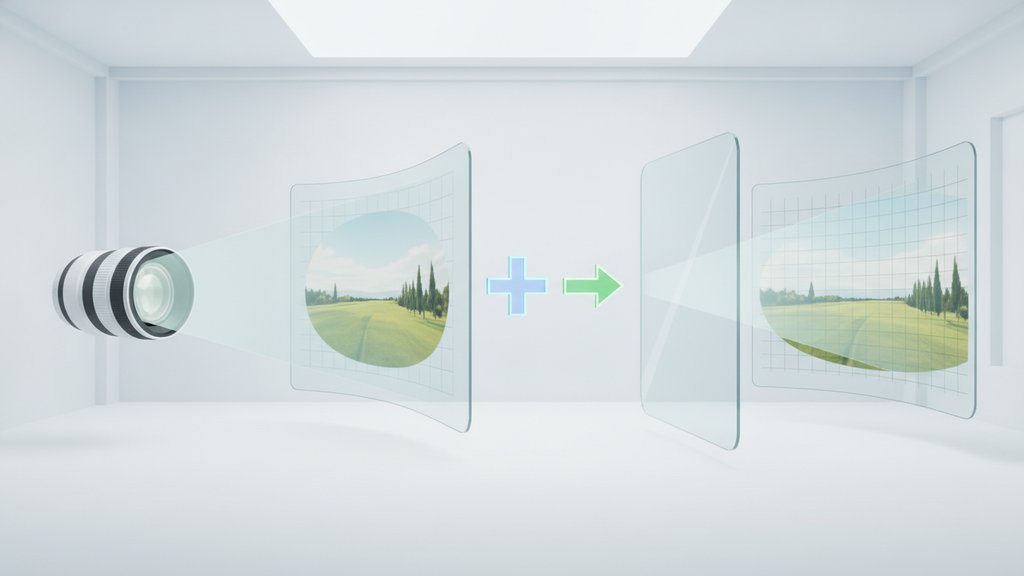
Lens distortion is a warping of straight lines in a photo caused by the shape of your camera lens, and lens distortion correction is the process of digitally straightening those bent lines back to how they should look. The two most common types are barrel distortion (where lines bulge outward, like the sides of a barrel) and pincushion distortion (where lines pinch inward toward the center). You fix it either automatically using a lens profile or manually by pushing a correction slider until straight edges look straight again.
Content Table
What is lens distortion
Lens distortion (also called optical distortion) is an optical flaw where straight lines in a scene do not appear straight in the final image. A perfectly rectilinear lens would render a wall edge, a door frame, or the horizon as a dead-straight line. Real lenses bend those lines slightly, especially near the edges of the frame.
It is a geometric problem, not a focus or exposure problem. The image can be perfectly sharp and correctly exposed and still show distortion. It only affects the shape and position of details, which is why it stands out most on architecture, product shots, and anything with obvious straight edges.
Types of lens distortion
There are three shapes you will run into most often:
| Type | What it looks like | Common on |
|---|---|---|
| Barrel distortion | Lines bulge outward from the center, like the surface of a barrel | Wide-angle lenses, phone cameras, action cams |
| Pincushion distortion | Lines pinch inward toward the center, corners get stretched away | Telephoto and zoom lenses at long focal lengths |
| Mustache (complex) distortion | A mix of both: lines curve one way near the center and the other way at the edges | Cheaper wide zooms and some kit lenses |
If you have ever wondered what is barrel distortion when reading lens reviews, that is the outward bulge you see in almost every ultra-wide shot. Pincushion distortion is the opposite and shows up when you zoom in tight. Mustache distortion is the trickiest because a single correction slider cannot fully fix it; it needs a proper lens profile.
Why lens distortion happens
Distortion is a physical side effect of bending light through curved glass. A camera lens is a stack of glass elements shaped to focus light onto a flat sensor. Getting light from a wide field of view onto that flat surface forces engineers into trade-offs, and geometry is usually the first thing they sacrifice.
- Focal length: Wide-angle lenses squeeze a huge scene onto the sensor, which tends to produce barrel distortion. Longer focal lengths lean toward pincushion.
- Zoom lenses: A lens that covers many focal lengths compromises at every setting, so distortion often shifts from barrel at the wide end to pincushion at the long end.
- Price and size: Correcting distortion in glass needs more elements and better shaping, which costs money. Compact and budget lenses accept more distortion and rely on software to clean it up.
- Phone cameras: Tiny lenses with very wide angles distort a lot, but the phone corrects most of it automatically before you ever see the photo.
How to spot distortion in your photos
The easiest test is to look for something you know is straight and check whether the photo agrees:
- Photograph a doorway, bookshelf, or brick wall straight on.
- Look at the lines closest to the edges of the frame, not the center.
- If those edge lines curve outward, that is barrel distortion. If they curve inward, that is pincushion.
- The horizon in a wide seascape is a classic giveaway; a bulging horizon means barrel distortion.
Center lines usually look fine even in distorted images, so always judge by the edges. Keep in mind that distortion can hide under other issues too. If a shot looks off overall, rule out softness first by checking our guide on how to fix blurry photos before assuming the geometry is the problem.
How to fix lens distortion
There are two reliable routes, and most editors offer both.
1. Automatic correction with a lens profile
Modern raw editors read the lens and camera info stored in your photo's metadata and apply a matching correction profile. This is the most accurate method because the profile is measured for that exact lens at that exact focal length, so it handles even mustache distortion cleanly.
- Look for a "lens correction" or "enable profile corrections" option.
- The editor matches the profile automatically from EXIF data.
- It straightens lines and often fixes vignetting at the same time.
2. Manual correction with a distortion slider
When no profile exists (some manual lenses, adapted glass, or edited files that lost their metadata), you correct by hand:
- Find the distortion or "amount" slider in the lens or geometry panel.
- Drag toward the negative side to fix barrel (pull the bulge back in).
- Drag toward the positive side to fix pincushion (push the pinch back out).
- Line up a known-straight edge with a grid overlay and adjust until it stops curving.
Distortion correction pairs well with other cleanup steps. Once the geometry is fixed, edges can look a touch soft from the stretching, so a light pass of image sharpening helps restore crispness. If colors also drifted, a round of color correction basics finishes the frame. And if you plan to print, make sure the file holds up by reviewing how to fix low resolution photos before printing, since cropping during correction reduces resolution.
Distortion vs perspective correction
People mix these up constantly, but they solve different problems.
| Correction | Fixes | Caused by |
|---|---|---|
| Lens distortion correction | Curved lines that should be straight | The optics of the lens itself |
| Perspective correction | Straight-but-tilted lines, like a building that leans back | The angle you held the camera at |
A building shot from below has converging vertical lines: those lines are perfectly straight, just tilted, so that is a perspective problem, not distortion. Distortion is about curvature. In practice you often apply distortion correction first (straighten the curves), then perspective correction (fix the tilt). For deeper reading on how lenses render geometry, the Wikipedia entry on optical distortion breaks down the math behind each type.

Prep your corrected photos in the right format
After lens distortion correction crops and reshapes your image, our free image converter helps you export it to the format you actually need, whether that is JPG for the web or something print-ready.
Try Our Free Image Converter →
Slightly. Correction stretches parts of the image and crops the edges to keep a rectangular frame, which lowers effective resolution a little and can soften corners. The loss is usually minor and worth it for straight lines. Shoot with a bit of extra margin so cropping never cuts into your subject.
Most phones already correct barrel distortion automatically before saving, so the photo you see is mostly fixed. If some bulge remains, especially on ultra-wide shots, you can reduce it further with a manual distortion slider in almost any photo editor by dragging toward the negative side.
Wide-angle lenses squeeze a very large scene onto a flat sensor, which produces barrel distortion. This bows straight edges outward, most visibly near the frame borders. Enabling a lens profile or nudging a manual correction slider straightens those walls back to how they actually look in real life.
Distortion correction fixes lines that are curved when they should be straight, a flaw caused by the lens optics. Perspective correction fixes lines that are straight but tilted, like a building leaning backward, caused by the camera angle. They are separate tools and often used together.
Automatic profile-based correction is usually more accurate because it is measured for your exact lens and focal length, and it handles complex mustache distortion. Use manual correction only when no profile exists, such as with adapted or manual lenses, or when your file has lost its camera metadata.